Digital Submission
Create your account in class on the AP Digital Submission Portal - apstudio.ets.org
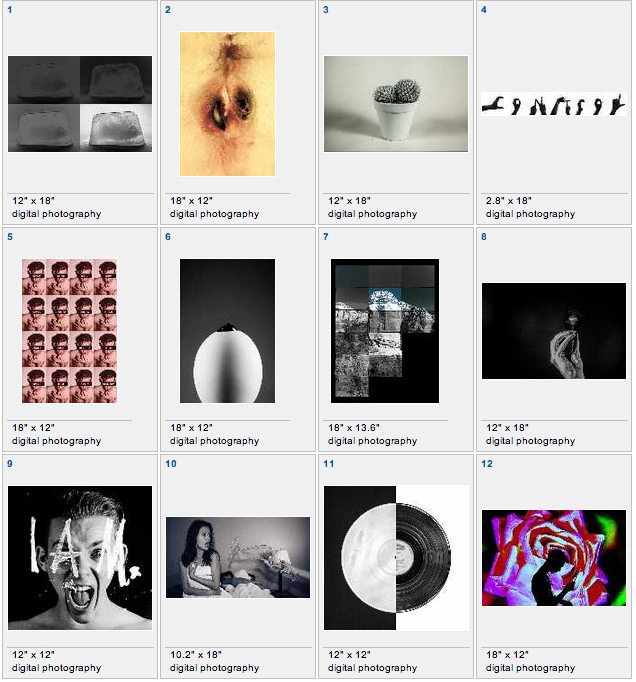
The AP exam is scored almost exclusively based on photographs of your artwork.
It is very important to have clear, high quality photos for your portfolio.
2D/Drawing: Submit ONE photo of each project
3D: Submit TWO images of each project (different angles)
The AP exam is scored almost exclusively based on photographs of your artwork.
It is very important to have clear, high quality photos for your portfolio.
2D/Drawing: Submit ONE photo of each project
3D: Submit TWO images of each project (different angles)
|

|
Requirements for Students’ Digital Images
All images must be submitted in:
JPEG format (file name extension .jpg)
RGB color mode
72 pixels-per-inch (ppi)
Maximum FILE SIZE:
Cannot exceed 3.0 MB per image.
JPEG format (file name extension .jpg)
RGB color mode
72 pixels-per-inch (ppi)
Maximum FILE SIZE:
Cannot exceed 3.0 MB per image.
Image size:
• Landscape orientation:
• Maximum size: 780 x 530 pixels (7.36 x 10.83 inches)
• Minimum size: 480 x 480 pixels (6.67 x 6.67 inches)
• Portrait orientation:
• Maximum size: 530 x 780 pixels (10.83 x 7.36 inches)
• Minimum size: 480 x 480 pixels (6.67 x 6.67 inches)
• Landscape orientation:
• Maximum size: 780 x 530 pixels (7.36 x 10.83 inches)
• Minimum size: 480 x 480 pixels (6.67 x 6.67 inches)
• Portrait orientation:
• Maximum size: 530 x 780 pixels (10.83 x 7.36 inches)
• Minimum size: 480 x 480 pixels (6.67 x 6.67 inches)
Tips for Good Photos
A VERY brief look at digital photography...
-- Digital photographs are actually mosaics of millions of tiny squares called picture elements—or just pixels.
-- Pixels have no set size. A device can spread the available pixels over a small or large area on the screen or printout.
-- As pixels are enlarged, an image is spread over a larger area, and its perceived sharpness falls (from the same viewing distance). When enlarged past a certain point, the individual pixels begin to show— the image becomes pixilated.
-- Although larger sensors can give you sharper images and better enlargements, more pixels also means larger image files. Not only do larger files take up more storage space, they take longer to transfer, process, and edit and are often far too large to e-mail or post on a Web site.
Camera
Use the best camera you have access to.
Select a camera settings that captures the highest-resolution, highest-quality images possible. Once a photo is captured, its resolution cannot be increased.
If the image will be viewed online, 72 pixels/inch is sufficient.
If the image will be printed, 300 pixels/inch is needed.
An image can be "sized down" easily but should not be sized up.
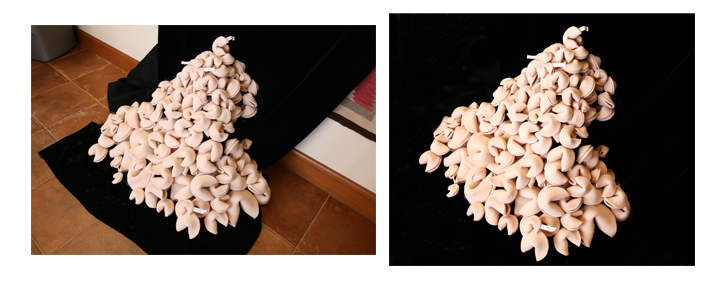
Background
Use Simple Backgrounds - gray, white, or black
The background of a two dimensional piece should be black or white. You need to decide which will flatter your work better. If the work is on paper you can temporarily tape it to the wall, without the tape showing, to photograph it.
Photograph the entire work, with as little as possible of the mat or background against which the work is being shot.
For three-dimensional work, the background should be a sloping gray paper that comes down from a roll above and sits underneath your work. This creates a gradation of gray behind the piece when photographing it.
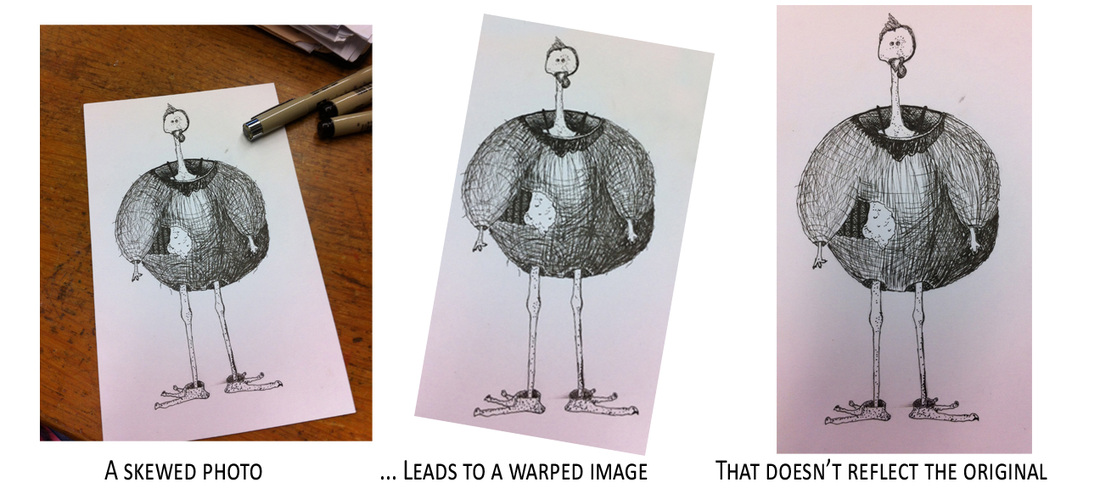
Warping and Proportions
"Square" the Art - edges of artwork should be parallel to the edges of the viewfinder
If possible, use a tripod. A tripod will help you get the image proportioned correctly. You do this by making sure that the lens of the camera is facing the artwork straight on or is on a parallel plan to the artwork. If the lens is positioned slightly below the image but tilted up the artwork will appear skewed. Skewing such as this is not easy to fix in digital editing programs.
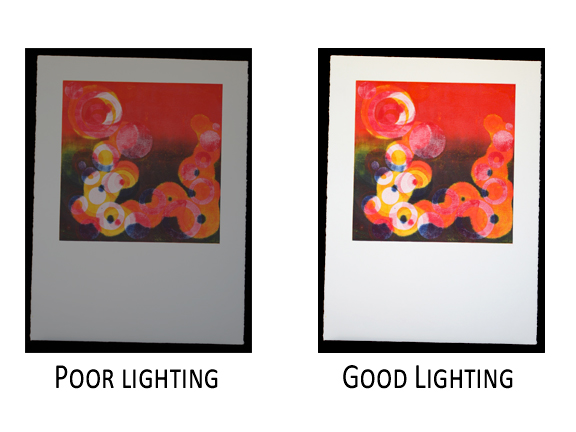
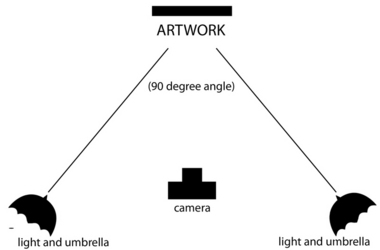
Lighting
Avoid fluorescents, use natural light if available
If you photograph inside and use studio lighting, the lights need to be equidistant from the piece and coming out at a 45 degree angles from the wall at opposite sides of the art. This will give you the best even lighting. Some paintings will produce a glare at this angle. You may adjust the lights to see if you can get rid of it. As you do that try to keep the lighting even on the surface of the work.
|
|
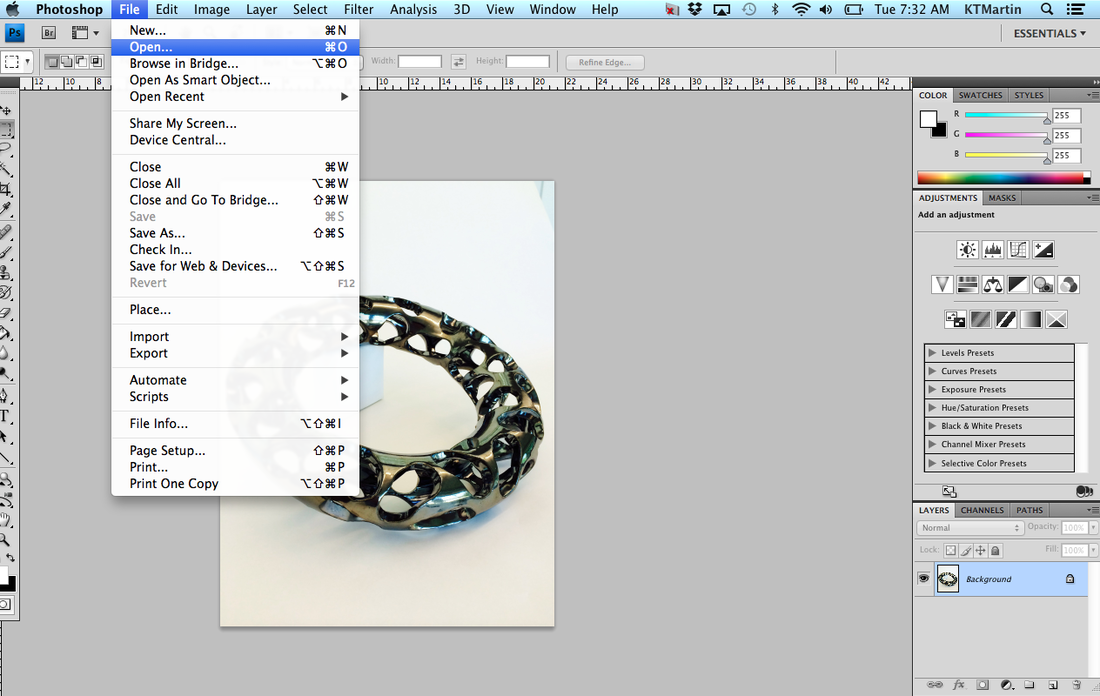
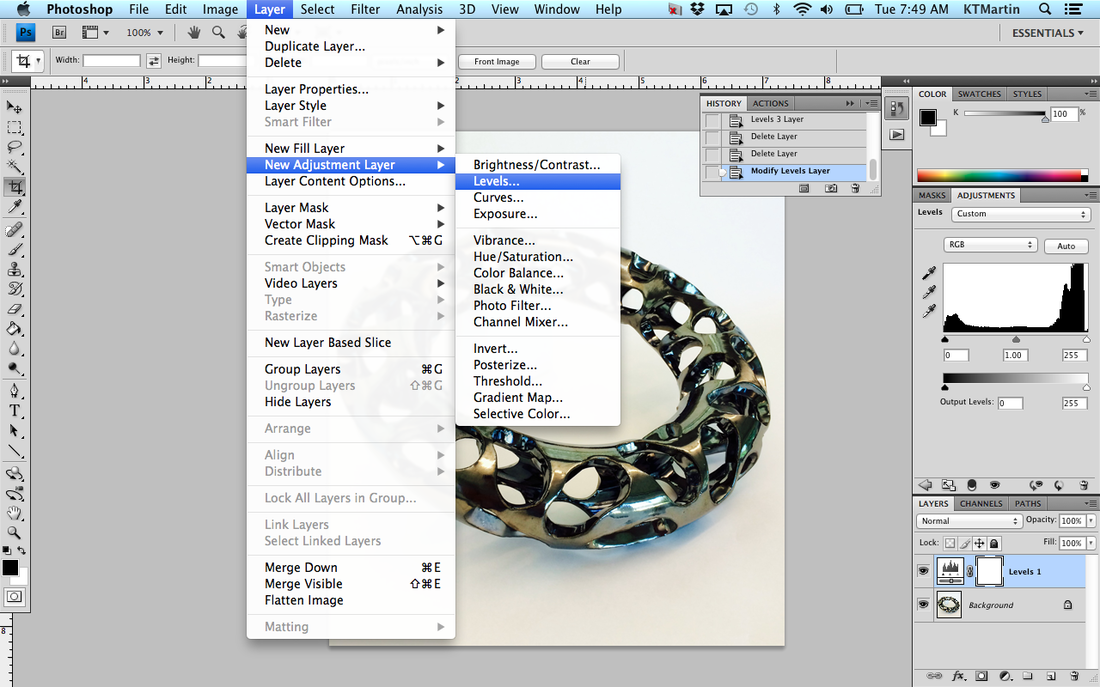
RESIZING PHOTOS w/ Photoshop
Open File
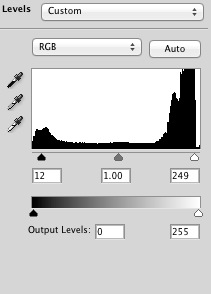
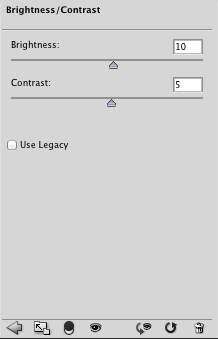
Basic Photo Adjustments
Levels, Brightness/Contrast
|
|
|
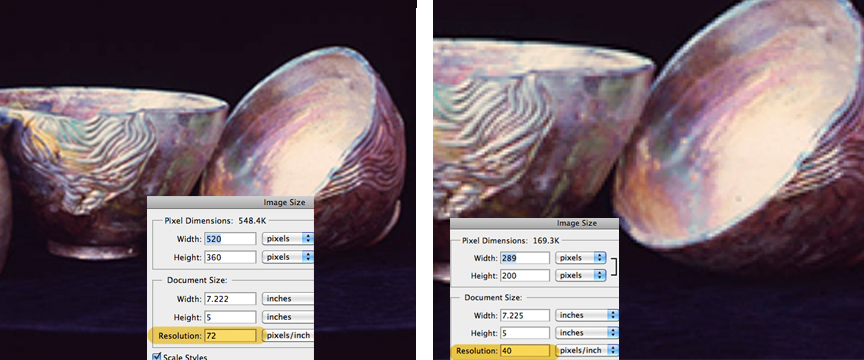
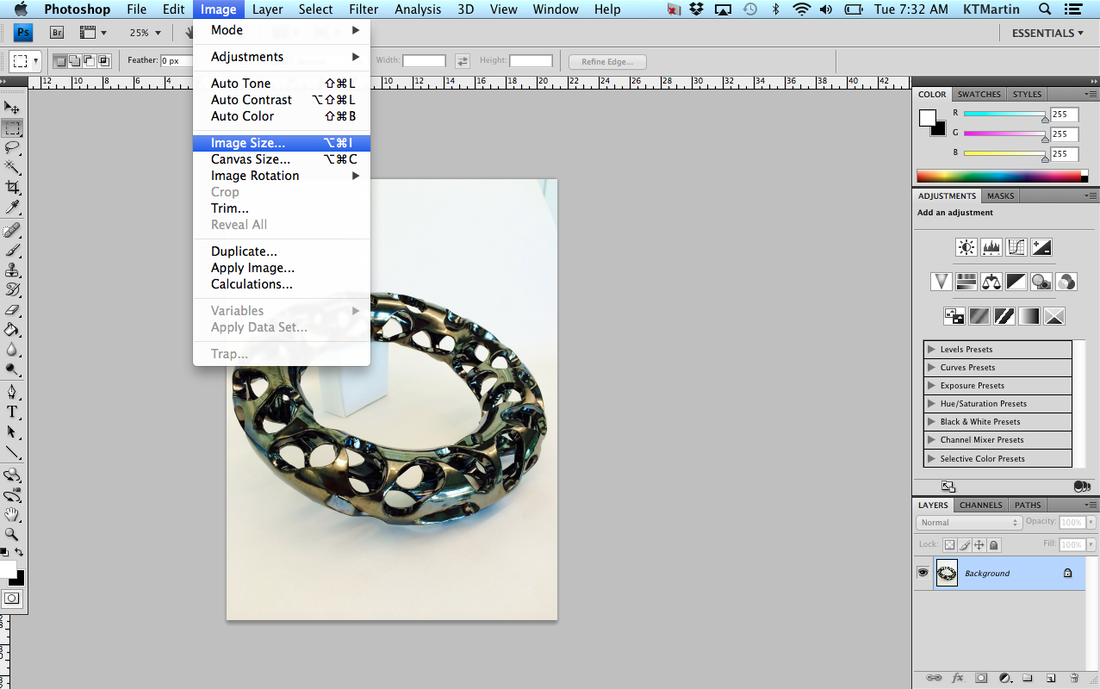
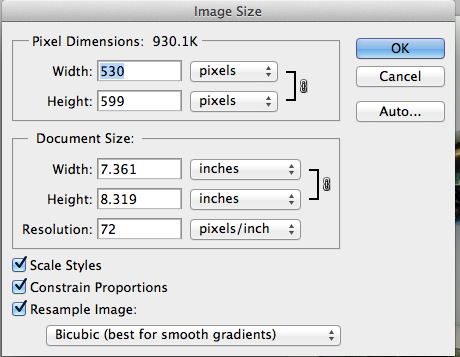
Image Size
Maximum size: 530 x 780 pixels (10.83 x 7.36 inches)
Minimum size: 480 x 480 pixels
|
|
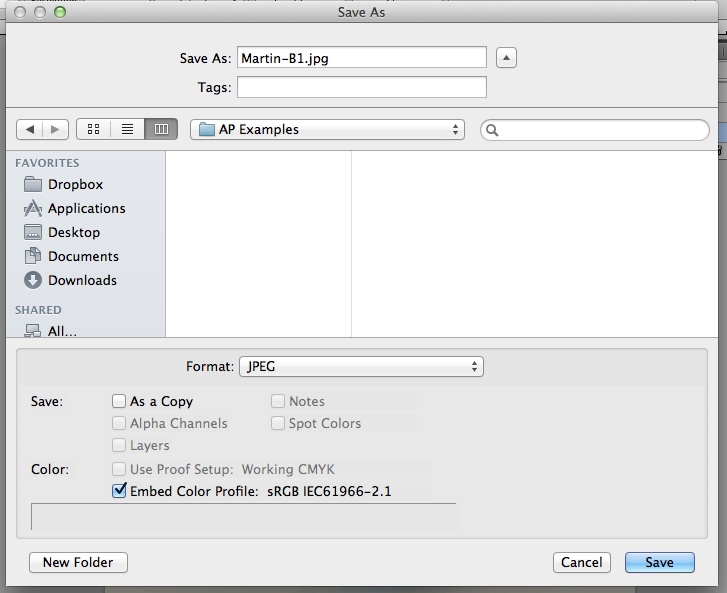
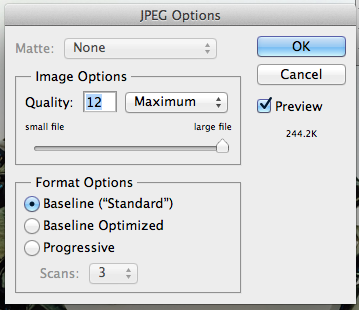
Save-As
|
|
